
Chainsaw Chain Keeps Loosening: Causes and Tension Checks
Chainsaw chain keeps loosening? Check heat expansion, bar nuts, tensioner parts, guide bar wear and dealer assembly before the chain comes off.
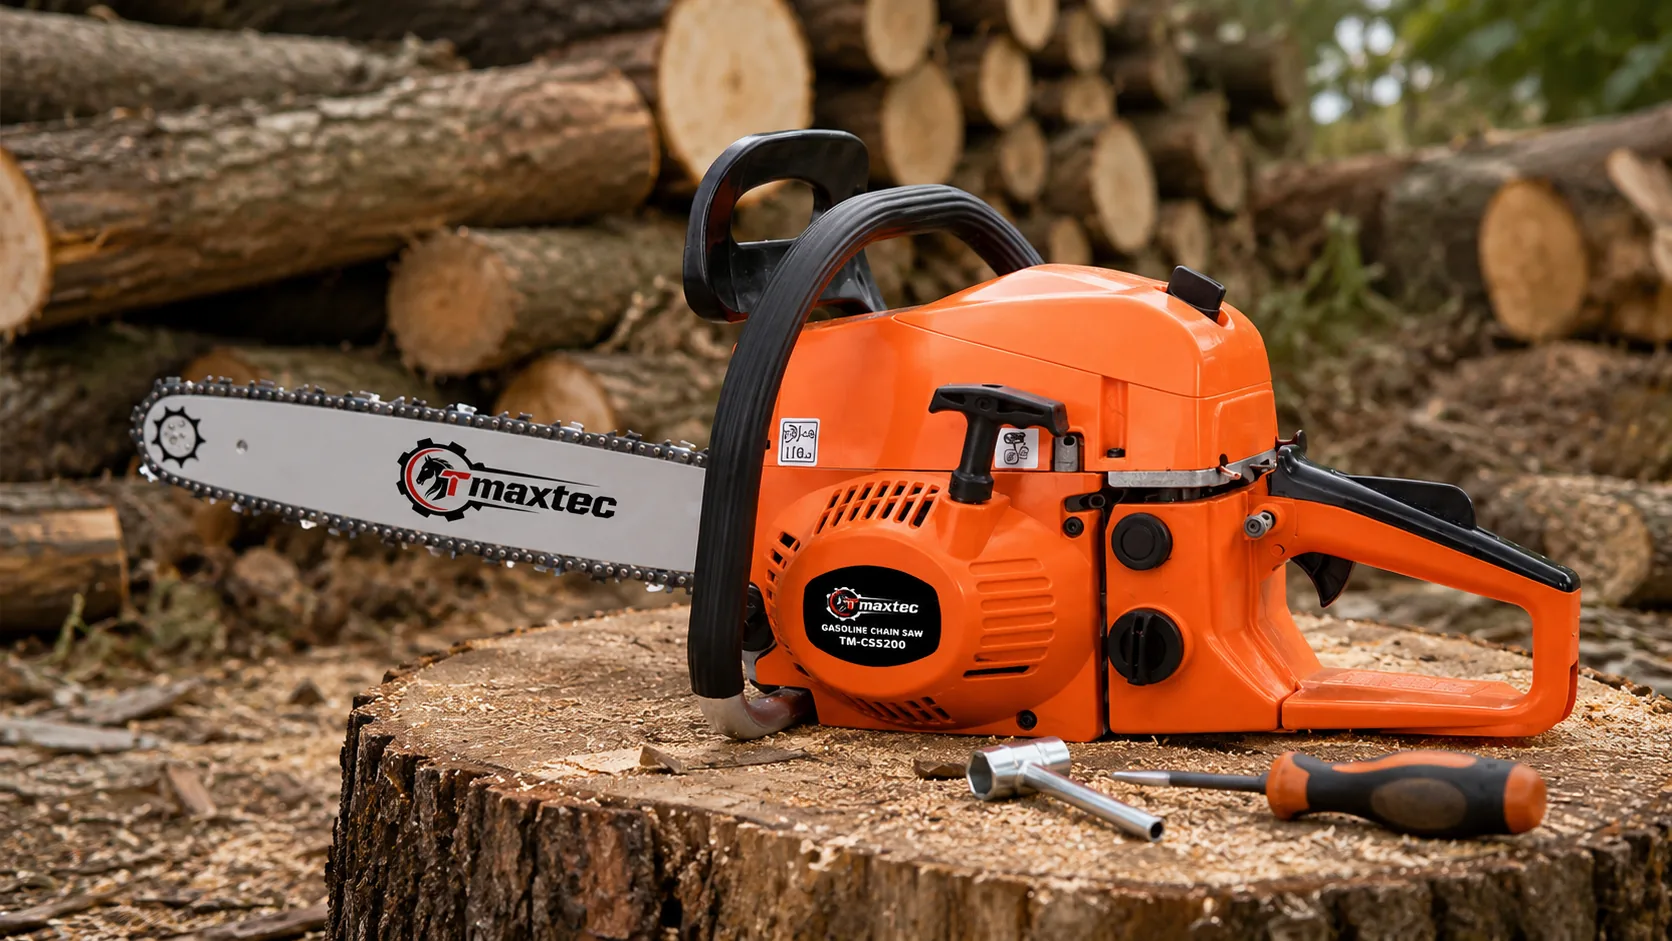
|
Service File
CS-02
Chain Tension Stability
|
Chainsaw Maintenance, Assembly and Dealer Inspection Guide A chainsaw chain may loosen because it expands during cutting, was tensioned incorrectly, is mounted on worn components or is not being held securely by the guide-bar hardware. Repeated tightening without finding the cause can damage the chain, guide bar, tensioner and drive sprocket. |
|
Quick Answer Stop the saw as soon as the chain hangs below the bar. |
A small amount of adjustment during a new chain’s first working period can be normal. A chain that needs tightening every few minutes is not normal. Inspect the tensioning method, guide-bar nuts, tensioner pin, chain lubrication, guide-bar groove, drive sprocket and replacement-chain compatibility before continuing work. |
Chain tension changes naturally as the cutting system heats and cools. However, temperature is only one possible cause. Incorrect assembly, worn parts and insufficient chain oil can all create the same customer complaint.
For dealers and importers, loose-chain complaints should be treated as a complete cutting-system issue rather than a chain-only problem. Assembly quality, spare-parts matching and customer training directly affect after-sales costs.
Immediate Diagnostic Board
| When It Loosens | After long cutting sessions | First Suspect | Heat expansion |
| When It Loosens | Immediately after assembly | First Suspect | Incorrect tensioning method |
| When It Loosens | After vibration or heavy cuts | First Suspect | Loose bar nuts |
| When It Loosens | At irregular intervals | First Suspect | Worn bar, sprocket or damaged chain |
|
01
|
Temperature Check Is the Chain Becoming Loose Only After It Heats Up? |
A saw chain becomes warmer as it moves around the guide bar and cuts wood. As the metal heats, it expands slightly and the chain may sit farther away from the lower edge of the bar.
A small change after a long cutting session can be normal. The chain should still be checked immediately because continued operation with visible slack can damage the drive links or allow the chain to leave the guide bar.
Safe Response to Heat-Related Slack
Stop the engine, place the chainsaw on stable ground, allow the cutting equipment to cool enough for safe handling, wear gloves, inspect the chain for damage and retension it according to the model instructions.
Never adjust chain tension while the engine is running. Do not overtighten a hot chain because it may contract as it cools and become excessively tight.
|
02
|
New Chain Check Why a New Chain Needs Early Adjustment |
A new chain settles into the guide-bar groove, drive sprocket and riveted joints during its first working period. This can make it appear to stretch faster than an older chain.
| 1 Confirm Direction | 2 Fill Chain Oil | 3 Set Tension | 4 Run Briefly | 5 Recheck |
The need for adjustment should gradually reduce. A chain that continues loosening at the same rate after repeated use should be inspected for mounting, lubrication, sprocket or bar problems.
|
03
|
Adjustment Method Tension the Chain While Holding the Bar Nose Up |
A common assembly mistake is adjusting the chain while the guide-bar nose is hanging downward. After the bar nuts are tightened or the bar contacts timber, the bar nose can move upward and create additional slack.
Correct General Tensioning Sequence
| A | Loosen the guide-bar nuts slightly. |
| B | Lift the guide-bar nose and hold it in the working position. |
| C | Turn the tensioning screw until the chain sits against the lower bar rail. |
| D | Confirm that the drive links remain engaged in the groove. |
| E | Tighten the guide-bar nuts while keeping the nose raised. |
A correctly adjusted chain should sit against the lower edge of the guide bar, remain engaged in the groove and move around the bar by hand while protective gloves are worn.
The exact method can vary between chainsaw designs, so the supplied manual should remain the primary reference.
|
04
|
Mounting Hardware Guide-Bar Nuts Must Hold the Bar Securely |
The tensioning screw positions the guide bar, but the bar nuts hold it in place during cutting. Loose or damaged mounting hardware allows the guide bar to move backward under vibration and release chain tension.
|
Hardware Check Nuts and StudsInspect loose nuts, damaged threads, bent studs and missing washers. |
Mounting Check Contact SurfacesRemove dirt, packed sawdust and oil sludge between the bar and saw body. |
Cover Check Clutch CoverConfirm that the clutch cover is seated correctly before final tightening. |
Do not use excessive force to compensate for damaged threads. Nuts or studs that cannot retain the specified clamping force should be replaced.
|
05
|
Tensioner Mechanism Confirm That the Tensioner Pin Engages the Guide Bar |
The tensioning screw usually moves an adjustment pin that fits into a hole in the guide bar. If the pin misses the hole, turning the screw will not move the bar correctly.
Inspect the Adjustment System for:
| • Incorrect tensioner-pin position | • A damaged bar adjustment hole |
| • Stripped tensioning-screw threads | • Bent or broken adjuster parts |
| • Packed debris around the mechanism | • Excessive movement in the adjuster |
A damaged tensioner should be repaired rather than forced with a screwdriver. Continued adjustment against a jammed mechanism can strip the threads and increase repair cost.
|
06
|
Wear Inspection Guide-Bar and Sprocket Wear Can Prevent Stable Tension |
| Component | Wear Sign | Effect on Chain | Dealer Action |
|---|---|---|---|
| Guide-bar groove | Excessively wide | Chain leans and moves sideways | Replace the guide bar |
| Bar rails | Uneven or rolled edges | Unstable chain position | Service or replace |
| Bar nose | Loose sprocket or damage | Irregular movement | Replace the bar |
| Drive sprocket | Deep grooves or uneven teeth | Irregular tension and drive-link wear | Replace when outside service limits |
| Chain joints | Stiff, loose or damaged | Tight in some positions and loose in others | Inspect and replace if unsafe |
A worn guide bar can damage a new chain quickly. Installing a new chain on a badly worn sprocket can also shorten the replacement chain’s service life.
|
07
|
Lubrication Insufficient Chain Oil Increases Heat and Wear |
A chain that receives too little oil heats rapidly and wears its rivets, drive links and guide-bar contact surfaces. As wear increases, maintaining stable tension becomes more difficult.
Oil SupplyConfirm that the chain-oil tank contains suitable lubricant for the local operating temperature. |
Oil PassageClean the saw-body oil outlet, guide-bar oil hole and bar groove. |
Oil TestConfirm visible oil delivery during a controlled test before cutting timber. |
Do not solve poor lubrication by overtightening the chain. Excessive tension creates additional friction and can make overheating worse.
|
08
|
Compatibility Replacement Chain, Bar and Sprocket Must Match |
A replacement chain must match the guide bar and sprocket in pitch, gauge and drive-link count. Similar-looking chains are not automatically interchangeable.
52cc Chainsaw Configuration Reference
|
Fixed Listed Pitch TM-CS5200Listed with 18-inch and 20-inch guide bars, a .325-inch chain pitch, 52cc displacement and 2.2 kW rated output.
|
Multiple Configurations TM-CS5201Listed with 18-inch and 20-inch bars and either .325-inch or 3/8-inch chain configurations depending on the selected specification.
|
Heavy-Cutting Option TM-CS5202Listed with 18-inch and 20-inch bar options and either .325-inch or 3/8-inch cutting-system configurations.
|
| Model | Displacement | Rated Output | Bar Options | Listed Pitch | Dealer Focus |
|---|---|---|---|---|---|
| TM-CS5200 | 52cc | 2.2 kW | 18 / 20 inch | .325 inch | Keep .325-inch spares clearly labeled |
| TM-CS5201 | 52cc class | Confirm batch | 18 / 20 inch | .325 or 3/8 inch | Verify the actual supplied configuration |
| TM-CS5202 | 52cc class | Confirm batch | 18 / 20 inch | .325 or 3/8 inch | Separate replacement parts by pitch |
Because the TM-CS5201 and TM-CS5202 may be supplied in different cutting-system configurations, dealers should confirm the actual guide-bar marking, sprocket pitch, chain gauge and drive-link count before ordering replacement parts.
|
09
|
Damage Inspection Inspect a Chain Carefully After It Leaves the Bar |
A derailed chain should not be installed again without inspection. Drive links can become bent or burred after striking the clutch cover, chain catcher, ground or nearby objects.
Chain Parts to Inspect
|
Movement Problems
|
A damaged chain may fit back onto the guide bar but still be unsafe. Replace it when the damage cannot be corrected within the chain manufacturer’s service limits.
|
10
|
Dealer Test How to Test Chain-Tension Stability Before Delivery |
A short no-load engine test is not enough. The chain, guide bar and mounting system should be tested under realistic cutting conditions.
|
Preparation Verify the chain specification, fill chain oil, raise the bar nose, set tension and secure the nuts. |
→ |
Cutting Test Confirm oil delivery and complete several controlled cuts in clean timber. |
→ |
Final Check Stop the engine, recheck tension, inspect the nuts and examine the chain again after cooling. |
When comparing the TM-CS5200, TM-CS5201 and TM-CS5202, record the actual chain pitch installed on each sample. Spare chains should be separated and clearly labeled so .325-inch and 3/8-inch components are not mixed.
Importer and Dealer Purchase Checklist
|
Assembly
|
Compatibility
|
Function
|
Commercial Supply
|
Importers should test several machines from each batch rather than relying on one display unit. Controlled cutting can reveal incorrect assembly, weak mounting hardware, inconsistent tensioner operation or poor oil delivery before shipment.
When the Chainsaw Must Be Removed from Service
- The chain cannot retain tension.
- The chain repeatedly leaves the guide bar.
- The tensioning screw no longer moves the guide bar.
- The bar nuts repeatedly loosen.
- A guide-bar stud is damaged.
- The drive sprocket has deep wear.
- The guide-bar groove is excessively wide.
- The chain is tight in some positions and loose in others.
- Lubrication does not reach the guide bar.
A chain that keeps loosening is not always suffering from normal chain stretch. The final diagnosis should include adjustment technique, guide-bar mounting, tensioner condition, lubrication, guide-bar wear, sprocket wear and replacement-chain compatibility.
Frequently Asked Questions
| 01 |
Why does my chainsaw chain loosen after cutting?Heat expansion is a common cause, but repeated loosening can also come from incorrect tensioning, loose bar nuts, insufficient lubrication or worn cutting components. |
| 02 |
Is it normal for a new chainsaw chain to stretch?A new chain often needs early adjustment as its joints settle into the bar and sprocket. The need for adjustment should gradually decrease. |
| 03 |
Why should the guide-bar tip be lifted during tensioning?Holding the bar nose up removes mounting play before the bar nuts are tightened. Adjusting with the nose hanging down can create slack later. |
| 04 |
Can loose guide-bar nuts make the chain lose tension?Yes. The nuts clamp the guide bar in position. If they loosen, the bar can move backward and release the chain tension. |
| 05 |
Can poor chain lubrication cause repeated loosening?Yes. Insufficient oil increases heat and wear at the chain joints, drive links and guide bar, making stable tension more difficult. |
| 06 |
Can I use the same replacement chain on the CS5200, CS5201 and CS5202?Only when pitch, gauge, drive-link count, guide-bar groove and sprocket all match. The CS5201 and CS5202 may use different chain configurations depending on the specification. |
|
Wholesale Model Review Match Every Chain to the Correct Bar and Sprocket |
Teamax Power offers 52cc chainsaw models with different cutting-system configurations. Importers and dealers should confirm the actual chain pitch, bar length, gauge and spare-parts plan before placing bulk orders.
|