
Earth Auger Drills Crooked Holes: Causes and Corrections
Learn why an earth auger drills crooked holes, how to correct bit wobble and operator error, and what dealers should check before bulk purchasing.
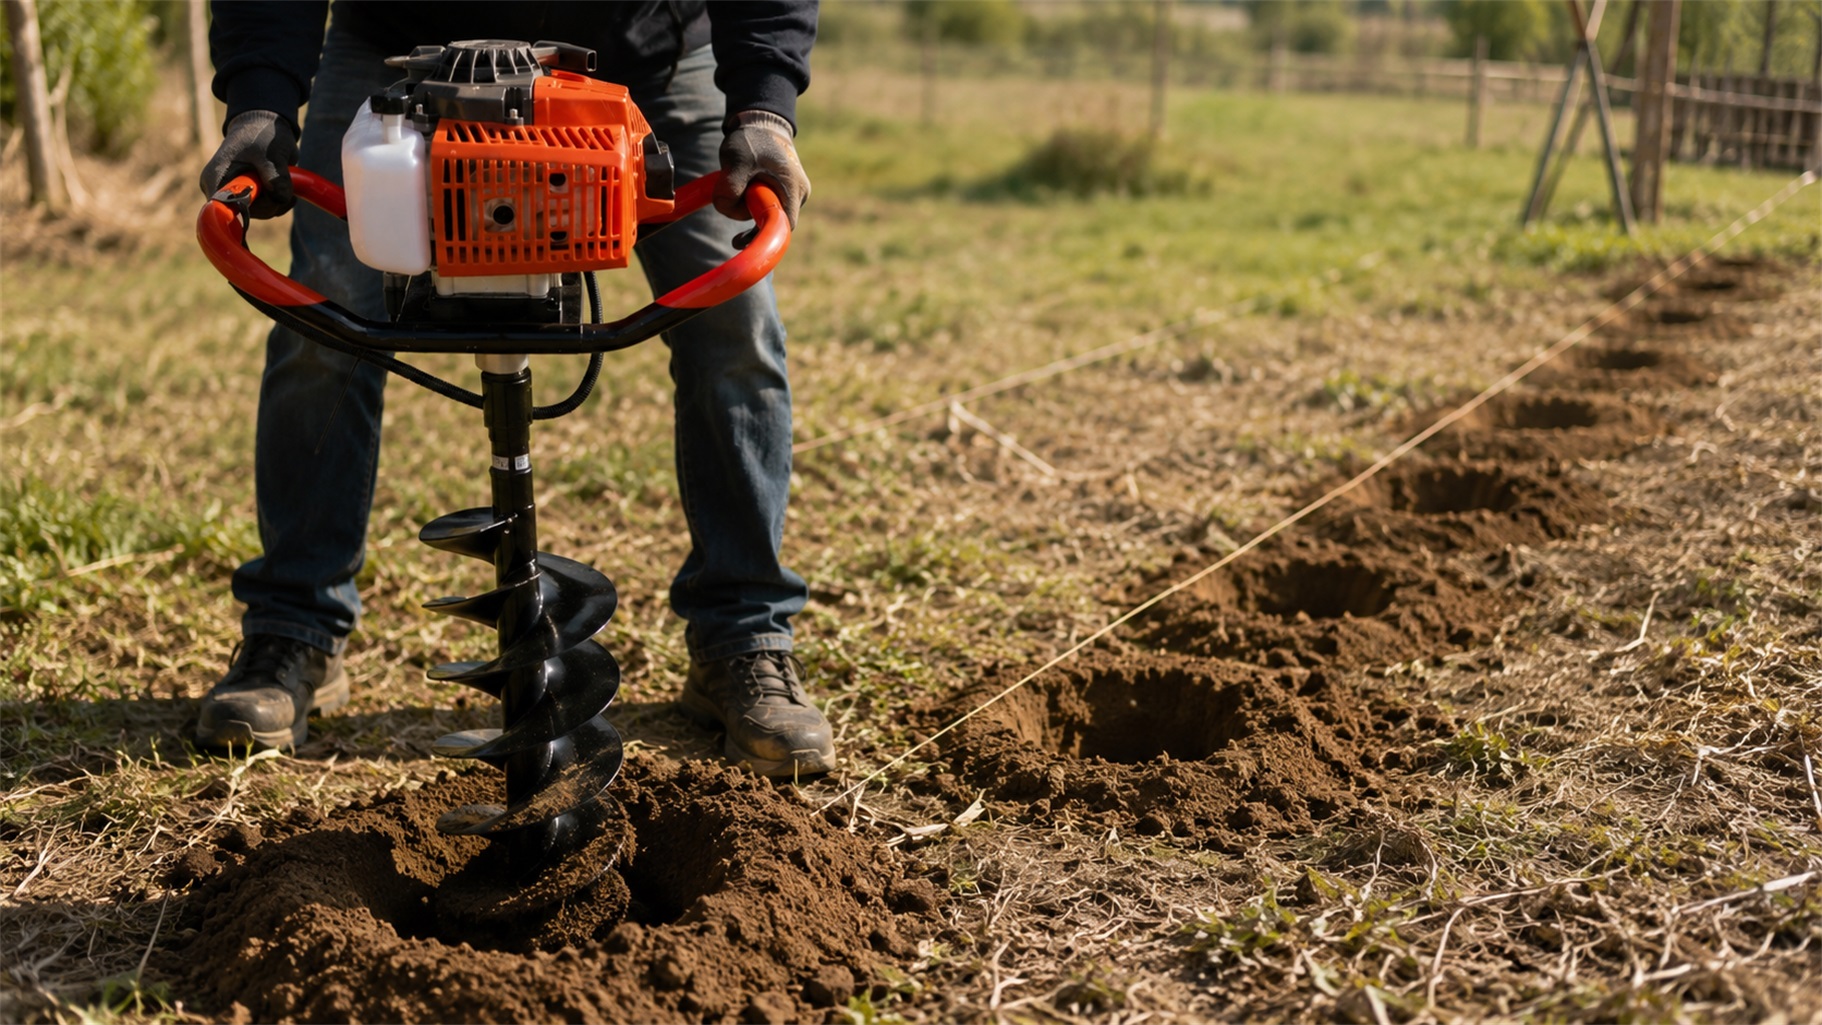
Crooked earth auger holes are usually caused by bit alignment, pilot-point wear, shaft damage, unsuitable drilling technique or uneven soil resistance—not simply a lack of engine power. This guide explains how operators, dealers and importers can identify the real cause before replacing unnecessary parts.
An earth auger normally begins drilling off-center when the bit enters the soil at an angle, the pilot point cannot hold the marked position, the shaft or extension is bent, or the operator cannot keep the machine vertical during the first few centimeters of drilling.
For dealers, crooked-hole complaints should be treated as a complete drilling-system issue. Adjusting the carburetor or replacing the engine will not correct a damaged drill bit, excessive connection clearance, uneven cutting blades, poor storage or an unsuitable bit diameter.
Inspect the auger from the cutting point upward. Check the pilot point, blades, shaft, retaining pin, connecting sleeve, extension and gearbox output before changing any engine settings. Then establish the hole center at low, controlled speed and verify vertical alignment from two directions.
|
Recommended
63 cc
|
TM-EA630A Gasoline Earth AugerA configurable earth auger for fence holes, orchard planting, farm support posts and general ground drilling. Optional drill diameters and lengths allow importers to select a configuration that better matches local applications.
|
Start With a Stationary Alignment Inspection
Before testing the auger in soil, place the machine on level ground and inspect the drilling assembly from several directions. Do not judge alignment only from the engine frame. The handle and engine may appear level while the removable bit underneath is already bent.
With the engine switched off and the spark plug disconnected, inspect the shaft from the connection point to the cutting tip. When permitted by the machine instructions, rotate the bit slowly by hand and observe whether the pilot point remains centered or travels in a circular pattern.
Visible movement may indicate:
- A bent drill shaft or extension
- A damaged or distorted connecting sleeve
- An incorrectly installed or undersized retaining pin
- Excessive clearance between the output shaft and drill bit
- A deformed pilot point
- Unevenly worn cutting blades or teeth
A small amount of movement near the cutting edge may come from normal production tolerance. Obvious side-to-side movement, however, should be investigated before the machine is returned to service.
Can a Worn Pilot Point Make the Hole Drift?
The pilot point is the first part of the auger to enter the ground. It establishes the drilling center and guides the larger cutting section downward. If the point is rounded, damaged or worn more heavily on one side, it may slide across hard soil instead of remaining on the marked position.
Once the pilot point moves away from the center, the auger flights normally continue along the new path. This is why a machine can appear to operate normally while repeatedly producing holes that lean in the same direction.
|
Starting Symptom
The point moves away from the ground mark as soon as the throttle is applied. |
Soil-Related Clue
The auger drills correctly in loose soil but drifts in dry clay or compacted ground. |
Wear-Related Clue
Heavy downward pressure or strong vibration is required during the first few centimeters. |
Replacing the pilot point may correct the problem when the shaft and flights remain straight. When the bit uses replaceable blades or teeth, inspect wear on both sides and replace matching components together where applicable.
The First Few Centimeters Determine the Hole Direction
Many crooked holes begin before the auger has reached working depth. The pilot point may be placed on the correct mark, but the engine unit is held slightly forward, backward or sideways. Once the bit has entered several centimeters at that angle, pulling the handle upright usually widens the top of the hole instead of correcting its direction.
| 01 | Mark the center of the required hole clearly. |
| 02 | Position the pilot point directly on the mark. |
| 03 | Check the shaft from both the front and the side. |
| 04 | Begin at controlled speed rather than immediately using full throttle. |
| 05 | Allow the pilot point to establish the center before increasing depth. |
| 06 | Recheck alignment and apply steady pressure without pushing sideways. |
Fence installers can use a nearby post, building edge, suspended line or another vertical reference to judge the shaft position. A second worker observing from another direction can also identify a forward or sideways lean that is difficult for the operator to see.
The actual operating procedure must match the machine design. One-person and two-person earth augers can require different handling methods, so operators should follow the instructions supplied with the specific machine and bit.
Why Excessive Downward Force Makes Control Worse
An earth auger should cut primarily through the pilot point and blades. It should not depend entirely on the operator’s body weight. Excessive pressure can cause the cutting point to search for the easiest path through roots, compacted layers, stones or buried debris.
Heavy pressure also increases vibration and reduces the operator’s ability to make small alignment corrections. Dealers should explain that pushing harder is not always the correct response when penetration becomes slow.
Reduce pressure and inspect the drilling condition when:
- Engine speed drops sharply under load
- The flights stop removing soil efficiently
- The handle repeatedly pulls toward one side
- The machine begins bouncing on the surface
- The hole becomes unusually wide near the top
Lift the auger periodically to clear loose soil from the flights. Attempting to complete a deep hole in one continuous pass can fill the flights, increase resistance and make the machine more difficult to control.
Bit Diameter, Drilling Depth and Hole Accuracy
A larger bit creates more cutting resistance and requires better control, especially in dry clay, compacted soil or ground containing roots. Using the widest available bit for every job may reduce working speed and increase the possibility of sideways movement.
The diameter should be selected according to the post size, planting requirement, soil condition, machine output, drilling depth and operator experience. Importers should avoid treating the bit as a generic accessory when preparing a bulk order.
| Application | Buying Focus | Common Accuracy Risk | Dealer Advice |
|---|---|---|---|
| Small planting holes | Smaller diameter and easy handling | Pilot point slides on dry ground | Stock replacement pilot points and explain controlled starting |
| Fence-post holes | Diameter matched to post and backfill space | Operator begins at a sideways angle | Recommend a vertical reference and staged soil removal |
| Orchard support posts | Consistent depth and multiple bit options | Roots pull one cutting side away | Confirm soil suitability and replacement blade availability |
| Deep drilling | Straight shaft, suitable length and secure extension | Small handle-angle errors become larger at depth | Test the standard bit before installing an extension |
The TM-EA630A gasoline earth auger can be configured with optional 10, 15, 20 and 25 cm drill diameters and several drill lengths. This gives buyers more flexibility than supplying one large bit for every application.
Importers should state clearly whether a drill bit is included in the quoted price and which diameter and length will be supplied. The phrase “earth auger with drill bit” is not sufficiently precise for a bulk purchase agreement.
Are Long Auger Bits More Difficult to Keep Straight?
Long bits are useful when deeper holes are required, but they also make small alignment errors more visible. A slight angle at the handle can produce a larger deviation at the lower end of a long shaft.
Long assemblies can also wobble when the extension joint has excessive clearance, the retaining pin is undersized, the shaft was bent during transport or the connection surfaces have worn.
Extension test for dealers
Test the machine first with a verified standard-length bit. If the standard assembly rotates correctly but wobbling begins after the extension is fitted, inspect the extension shaft, both connection points and the retaining-pin specification.
Dealers offering multiple drill lengths should confirm that each extension matches the correct output-shaft diameter, connection type and retaining pin. Long shafts should also be supported properly during storage rather than left under heavy cartons or uneven pressure.
Stones, Roots and Uneven Soil Resistance
Soil is rarely uniform. One side of the cutting edge may contact a stone, root or compacted layer while the other side remains in softer ground. The auger naturally moves toward the side with less resistance.
When the bit suddenly pulls sideways, release the throttle and stop the machine before inspecting the hole. Remove loose soil and check for stones, roots, metal, old concrete or buried construction debris.
Do not repeatedly force the bit against a solid obstruction.
Repeated impact can damage the pilot point, bend the shaft, loosen the connection, wear the gearbox or increase the operator’s loss of control. Rocky and heavily compacted markets may require different cutting teeth, pilot structures or drilling equipment.
How to Separate a Bit Problem From a Gearbox Problem
Remove the drill bit and inspect the gearbox output shaft separately. Rotate the output slowly according to the recommended service procedure and observe whether it remains centered.
If the output shaft itself moves from side to side, the fault may be inside the drive assembly. Possible causes include worn bearings, a bent gearbox shaft, impact damage, loose gearbox mounting bolts or incorrectly installed internal components.
| Test Result | Likely Inspection Area | Recommended Next Step |
|---|---|---|
| Output shaft rotates centrally without the bit | Removable bit, sleeve, pin or extension | Install a verified straight test bit |
| Output shaft itself moves side to side | Gearbox shaft, bearing or mounting | Stop operation and inspect the drive assembly |
| Standard bit is straight but extension wobbles | Extension and connection points | Check fit, pin size and extension straightness |
| Wobble follows one customer bit | Customer accessory | Replace or repair the damaged bit |
Dealers should keep at least one verified straight test bit for after-sales diagnosis. Without a reference accessory, a damaged customer bit can easily be misdiagnosed as an expensive gearbox defect.
What Importers Should Confirm Before Bulk Ordering
Crooked-drilling complaints frequently involve the bit and connection system rather than the gasoline engine. Buyers should therefore inspect more than displacement, rated output and fuel-tank capacity when comparing suppliers.
Earth Auger Procurement Audit
|
□ Available drill diameters and lengths
□ Standard bit supplied with each machine
□ Output-shaft and connection dimensions
□ Retaining-pin type and diameter
□ Pilot-point and cutting-blade design
□ MOQ for machines, bits and spare parts
|
□ Extension compatibility and maximum length
□ Shaft straightness inspection before packing
□ Individual transport protection for long bits
□ Spare pins, points, blades and gearbox parts
□ Assembly and operator instructions
□ Repeat-order specification consistency
|
The TM-EA630A product information lists a two-stroke, air-cooled 1E48F engine, 63 cc displacement and 2.5 kW rated output, with optional drill lengths from 80 to 140 cm and optional diameters from 10 to 25 cm.
Final specifications should always be confirmed in the quotation and purchase agreement. Importers should identify the exact bit diameter, length, shaft connection, packaging method and spare-parts quantity rather than relying only on a model name.
In markets where customers drill fence holes, orchard planting holes and farm support-post holes, stocking several useful diameters may produce fewer complaints and better repeat orders than supplying only one oversized bit.
Match the TM-EA630A to the local drilling application
Importers can discuss drill diameter, drill length, standard accessories, packaging and spare-parts planning according to local soil conditions and customer use.
| View This Model |
Daily Practices That Help Keep Holes Straight
Inspect the auger before each working period instead of waiting until customers report visibly poor holes. Clean the bit, check the pilot point, inspect both cutting sides, tighten the connection and replace damaged retaining pins.
Long drill shafts should be stored with adequate support. Avoid dropping the assembly from a vehicle, allowing the bit to strike a concrete floor or stacking heavy cartons on top of exposed shafts.
During drilling, establish the center slowly, observe the shaft from two directions, clear soil in stages and stop when the machine repeatedly pulls toward one side. Continuing to force a drifting bit usually makes the hole wider and increases stress on the connection.
A straight hole depends on the full system: operator position, pilot point, cutting blades, shaft, retaining pin, extension, gearbox output and soil condition. Checking these areas in sequence is faster and more reliable than immediately adjusting the engine.
Frequently Asked Questions
Why does my earth auger start straight and then move sideways?
The bit may be meeting a root, stone or harder soil layer on one side. Stop the machine, clear loose soil and inspect the obstruction instead of forcing the handle back toward the center.
Can a bent earth auger bit be repaired?
Minor damage should be assessed by a qualified service provider, but visibly bent shafts may remain unbalanced after informal straightening. For reliable dealer service, replacement is often more practical than repeatedly correcting the same damaged bit.
Does a larger auger bit drill less accurately?
Not automatically, but a larger diameter creates greater resistance and requires better machine control. Accuracy can decrease when the bit is too large for the soil, machine output or operator experience.
How can a dealer check whether the gearbox is causing the wobble?
Remove the customer’s bit, inspect the output shaft and test the machine with a verified straight bit. If the output rotates centrally until the original bit is installed, the removable accessory is the more likely cause.
What earth auger spare parts should importers stock?
Useful stock normally includes retaining pins, pilot points, cutting blades or teeth, connecting sleeves, gearbox bearings, seals and commonly requested drill bits. The exact list should match the ordered connection system and local repair capability.
What should be written in an earth auger bulk order specification?
Specify the machine model, engine configuration, drill diameter, drill length, output-shaft size, retaining-pin type, included accessories, spare-parts quantity, packaging and any extension requirements.
Which bit size is suitable for fence-post holes?
The bit should create enough space for the post and required backfill without producing an unnecessarily large hole. The correct size depends on the post dimensions, soil stability, installation method and local construction practice.
Configure an Earth Auger for Your Local Market
Teamax Power can discuss suitable earth auger configurations for fence installation, orchard planting, farm support posts and general agricultural drilling. Drill diameter, length, accessories, packaging and spare-parts planning can be confirmed according to the final order requirements.
| Contact Us for Wholesale Price |