
Why Is a Backpack Power Sprayer Leaking From the Tank Cap?
Find why a backpack power sprayer leaks from the tank cap by checking overfilling, cap seals, vent blockage, tank tilt, foam, and damaged threads.
Field Troubleshooting and Dealer Inspection
Backpack Power Sprayer Leaking From the Tank Cap: Causes and Checks
A backpack power sprayer leaking from the tank cap is commonly overfilled, incorrectly sealed, contaminated around the threads or leaning too far while the operator walks. Tightening the cap harder is not the first solution. The initial task is to identify whether the liquid actually begins at the cap edge, the tank neck, a nearby hose connection or a crack in the tank.
This guide covers liquid appearing around the filling opening during carrying or spraying. It does not cover nozzle pressure loss, pulsating spray, pump-body leakage, high-pressure hose damage or other delivery-circuit faults.
1. Confirm Where the Liquid First Appears
Turn off the engine and place the sprayer upright on stable, level ground. Keep the machine away from people, animals, food, water sources and unprotected skin during inspection. Wear the protective equipment specified on the chemical label, and never remove the cap while the unit is unstable or still on the operator’s back.
Dry the outside of the tank, cap, filling neck and nearby fittings. Use only enough clean water for a controlled test, close the cap and gently move the machine. The first wet point is more useful than the final place where the liquid collects.
| First visible wet point | Likely inspection area | First action |
| Cap edge | Gasket, cap threads, filling level and foam | Lower the liquid level and reseat the cap |
| Below the tank neck | Cracks, deformation or damaged neck threads | Inspect the neck after cleaning and drying it |
| Nearby hose or clamp | Pump inlet, return line or hose connection | Treat it as a separate connection leak |
| Only during spraying | Pump inlet, return flow and fittings | Observe connections while operating safely |
| Only while walking or turning | Tank level, harness adjustment and machine tilt | Test with less water and a corrected carrying position |
Tracing the first wet point prevents a dealer from replacing the cap when the actual leak is below the filling opening or at a hose connection.
2. Separate Overfilling, Foam and Walking Movement
Nominal tank capacity should not automatically be treated as permission to fill liquid up to the cap opening. The solution moves as the operator walks, turns, bends, reaches with the lance or crosses uneven ground. When the liquid level is already close to the filling neck, each movement pushes it repeatedly against the seal.
Capacity is not the same as usable filling height
The TM-P908 is listed with a 30 L tank. In a substantially filled backpack tank, walking angle, sudden turning and uneven farmland can move a considerable volume of liquid toward the cap. Leave suitable expansion space according to the tank markings and chemical-mixing instructions rather than treating the filling neck as extra capacity.
Foam can create the same symptom even when the measured liquid volume appears acceptable. Some formulations foam when mixed aggressively or when return flow enters the tank. The foam rises above the liquid surface and may reach the cap before the tank appears full.
Follow the chemical label’s mixing order. Where the instructions permit, partially fill the tank with water, add the measured product carefully and then complete filling without unnecessary turbulence. Do not direct a strong water stream into a small amount of concentrated chemical, and do not shake a full power sprayer to mix the solution.
Allow naturally produced foam to settle before installing the cap. Never add an antifoaming agent unless it is approved for the chemical, crop and intended application.
3. Inspect the Gasket, Threads and Tank Vent in Order
Most tank caps use a gasket, sealing ring or shaped insert between the cap and tank neck. A cap may still screw on even when the seal is missing, folded or no longer able to recover its original shape.
| 1 | Remove and inspect the seal Check for twisting, folding, cuts, hardening, flattened areas, swelling, distortion, a missing insert, or crystals embedded in the sealing surface. |
| 2 | Clean both sealing surfaces Use a method compatible with the chemical previously used. Even a small dried particle can hold one side of the gasket away from the neck. |
| 3 | Start the cap straight Confirm that the cap engages evenly rather than immediately sitting at an angle. Remove soil, fertilizer particles and chemical residue without cutting or scraping the plastic. |
| 4 | Tighten by hand, not with tools A correct seal depends on even gasket contact. Excessive force can distort the gasket, crack the cap, damage threads or deform the tank neck. |
| 5 | Identify the vent design Depending on the cap configuration, a vent hole, valve or internal passage may allow air exchange as liquid is drawn from the tank. Clean it only according to the correct design. |
Cross-threading is often visible before the cap is fully tightened. One side may sit higher, the gap around the neck may be uneven, the cap may become difficult to turn after a short movement, or plastic dust and damaged thread edges may be present. Do not force a cross-threaded cap farther down.
Do not drill a larger vent hole or seal an intended breather passage with adhesive. When liquid exits through the vent during walking, reduce the filling level and keep the machine upright before deciding that the cap needs replacement.
Dealers should also warn operators not to use pliers or improvised levers on plastic caps. Tool marks can indicate overtightening or misuse rather than a pump-pressure problem.
4. Check Whether the Harness Keeps the Tank Upright
A backpack sprayer that hangs too low or leans to one side brings the liquid surface closer to the filling opening. This can explain why a unit remains dry on the ground but begins leaking during field movement.
Test the empty machine first
|
Then test with clean water
|
If the tank tilts sharply during these movements, correct the strap length and hose routing before repeating the test. Replacing a cap will not prevent leakage if the working position keeps pushing liquid against the filling opening.
The listed net weight of the TM-P908 is 11 kg before working liquid is added. Combined with its 30 L tank capacity, this makes strap condition and load stability especially relevant when the sprayer is substantially filled.
5. Inspect the Filling Neck and Avoid Unrelated Pump Adjustments
A correctly installed cap and gasket cannot seal against a structurally damaged tank neck. Clean the opening, place a straight reference across the sealing surface and look for uneven areas.
A leak that continues with a verified cap and a new compatible seal may indicate neck damage. Do not apply unsuitable glue to a chemical tank without confirming material compatibility and repair safety. Tank replacement may be safer when the opening is structurally damaged, particularly when the unit carries agricultural chemicals rather than clean water.
The sprayer’s working pressure applies to the pump delivery circuit, hose, valve and lance. It does not mean the chemical tank cap should be tightened as though it were a high-pressure vessel closure.
Diagnostic boundary: The TM-P908 has listed reference values of 1.5–2.5 MPa working pressure and 8 L/min working flow. These figures describe the output side of the spraying system. A leak at the filling cap should be investigated through filling level, sealing condition, venting, neck condition and tank position—not by adjusting pump pressure.
6. TM-P908 Power Sprayer for 30 L Applications
|
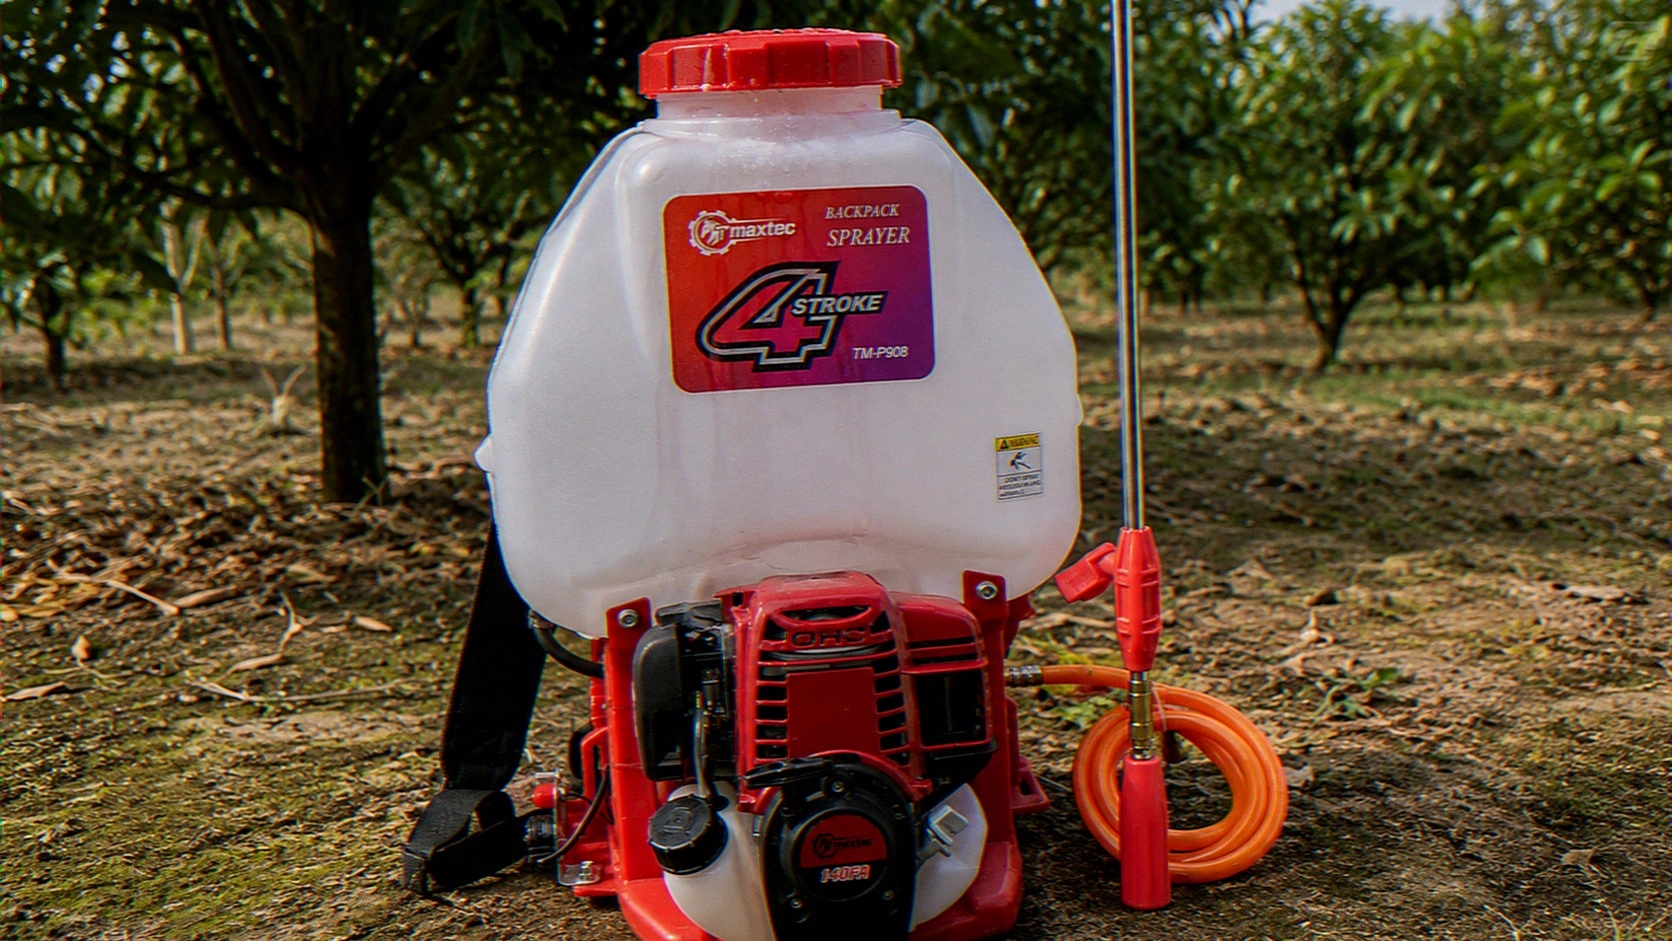
MODEL REFERENCE TM-P908 Four-Stroke Power SprayerThe TM-P908 is listed with a 30 L tank, an 11 kg net machine weight, 1.5–2.5 MPa working pressure and 8 L/min working flow. It is relevant to this troubleshooting topic because a substantially filled 30 L backpack tank requires correct cap sealing, stable harness adjustment and controlled walking movement. Procurement focus: Confirm the selected cap and gasket, tank-neck thread consistency, vent structure, harness adjustment range, hose routing and replacement seal availability before bulk ordering. |
|
7. Maintenance and Importer Inspection Checklist
Chemical crystals left around the cap can damage the sealing surface and make the threads difficult to engage during the next use. After spraying, handle rinsing water according to the chemical label and local requirements. Clean the cap, filling opening and filter area without allowing contaminated water to enter drains or natural waterways.
Allow removable parts to dry before storage. Store the cap in its normal position without excessive tightening, and inspect the gasket after long storage or before the next spraying season.
| Before Ordering | Incoming and Dealer Inspection |
|
|
A controlled walking test is more relevant to a tank-cap complaint than relying only on a stationary spray-pressure test. It reveals overfilling sensitivity, harness imbalance, cap seating problems and leakage that occurs when the liquid moves inside the tank.
8. Frequently Asked Questions
Why does my backpack power sprayer leak only while walking?
The liquid may be too close to the filling neck, the tank may lean because of uneven strap adjustment, or hose routing may pull the machine toward one side. Test it with less clean water and observe the tank while walking and turning.
Should I tighten the sprayer tank cap with pliers?
No. Excessive force may distort the gasket, crack the cap, damage the plastic threads or deform the tank neck. The cap should seal through correct gasket contact and proper thread engagement.
Can chemical foam cause a tank-cap leak?
Yes. Foam can rise above the actual liquid surface and reach the cap even when the measured solution volume appears acceptable. Follow the chemical mixing instructions and allow foam to settle before closing the tank.
How can I tell whether the cap is cross-threaded?
One side may sit higher, the gap around the neck may be uneven, or the cap may become difficult to turn after only a short movement. Plastic dust or damaged thread edges also indicate incorrect engagement.
Does high pump pressure cause liquid to escape from the tank cap?
The listed working pressure applies to the pump delivery circuit, hose, valve and lance. A filling-cap leak should first be traced through liquid level, gasket condition, threads, venting, tank-neck damage and carrying position.
What should importers test before ordering 30 L backpack sprayers?
Check cap and gasket compatibility, replacement-part availability, thread consistency, vent design, harness adjustment and hose routing. Sample units should be tested with clean water while standing, walking and turning.
9. Confirm the Tank and Cap Configuration Before Purchase
|
Review the TM-P908 configuration for wholesale supply A backpack power sprayer leaking from the tank cap should be checked in a fixed order: locate the first wet point, reduce the filling level, control foam, clean the threads, inspect the gasket, verify the vent and confirm that the tank remains upright. For bulk orders, confirm the final tank, cap, engine, accessories and packing details before production. |
|