
Why Does an Earth Auger Keep Getting Stuck in the Ground?
An earth auger stuck in the ground may be trapped by clay, roots, stones or excessive drilling depth. Learn how to free it safely and prevent repeat jams.
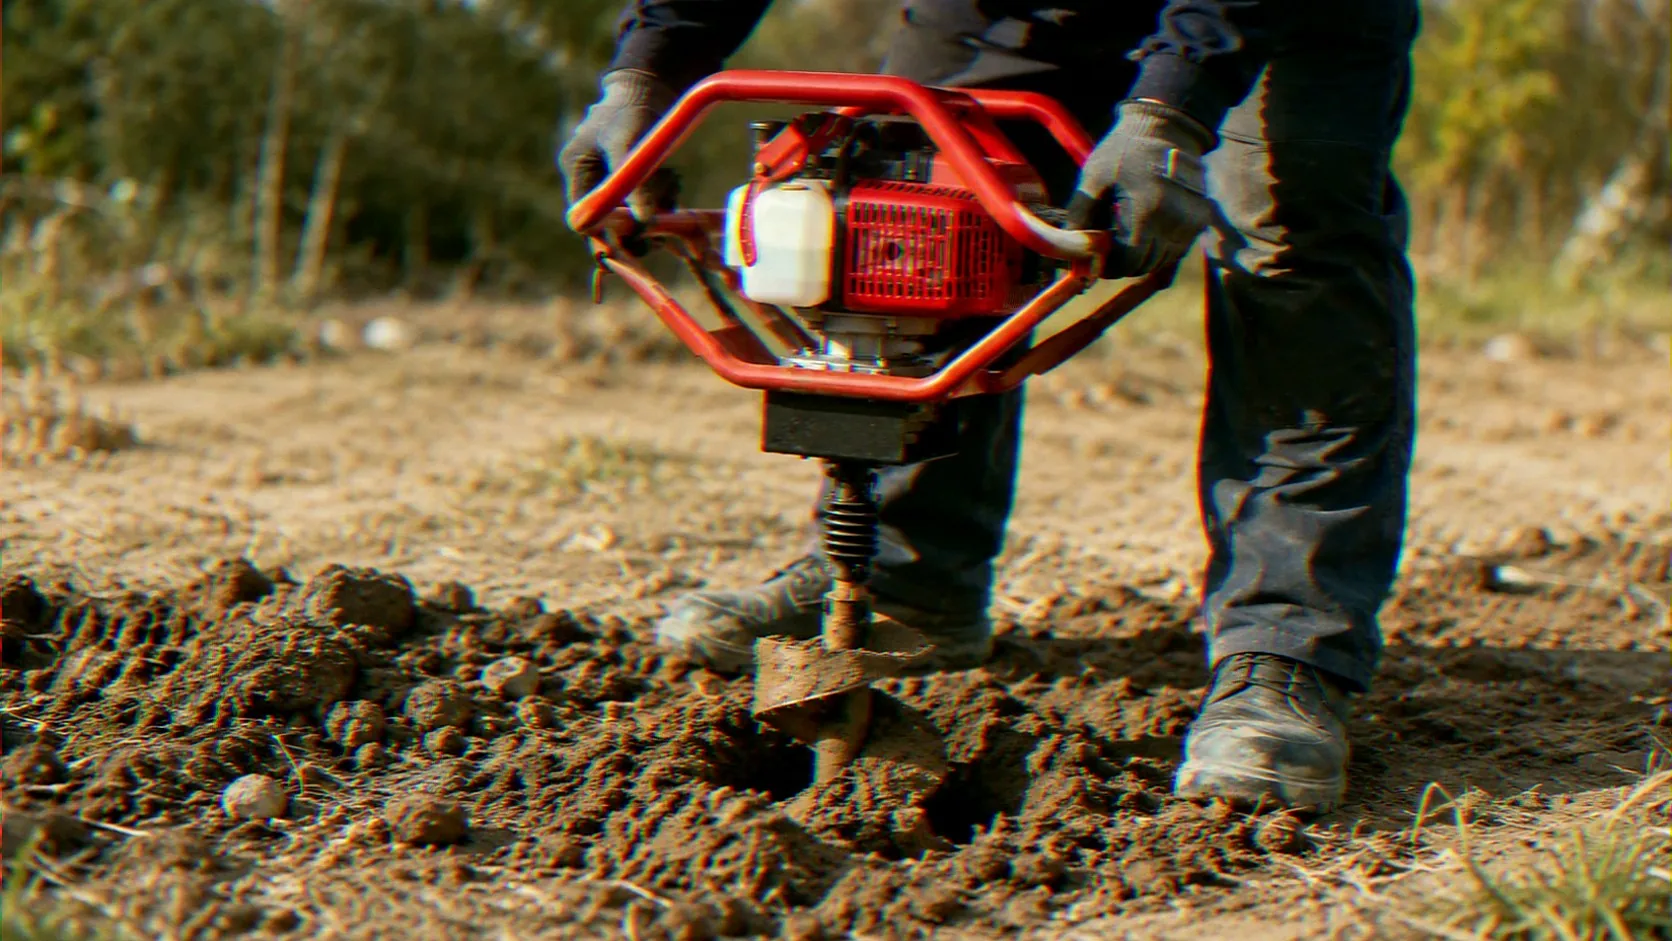
Field Recovery and Bit Inspection
Earth Auger Stuck in the Ground: Safe Removal and Dealer Troubleshooting Guide
An earth auger stuck in the ground is usually being held by compacted soil, wet clay packed around the flights, excessive drilling depth or a cutting edge caught against a root or stone. The safest recovery method is to stop the engine, remove the soil load gradually and expose the obstruction before applying more force.
This guide covers an auger that was drilling normally but is now trapped in the hole or difficult to lift. It does not cover an engine that stalls under load, a bit that spins without cutting, a bit that turns at idle or selecting a bit diameter for a new drilling application.
| Quick Answer Recovery Order | Quick answer: Shut off the engine, disconnect the spark-plug cap and clear loose soil from the top of the hole. Identify whether the bit is held by packed clay, excessive depth, a root or a stone. Apply a controlled upward pull with only small rocking movement, cleaning each exposed section of the flights as the bit rises. Do not use full throttle, vehicles, ropes or heavy blows. Importers and dealers should match bit length, diameter, shaft connection and cutting parts to the expected soil conditions. |
1. Shut Down the Auger Before Attempting Recovery
Release the throttle, switch off the engine and wait until the bit has stopped completely. Disconnect the spark-plug cap before placing hands or tools near the bit, coupling or gearbox.
Do not keep the throttle open while two people pull upward. If the bit suddenly releases, the machine can rise, twist or swing without warning. One person should maintain control of the handles while another clears soil from a safe position.
| Do not attach the auger to a vehicle. | Do not wrap rope around the handles. |
| Do not strike the gearbox to force it free. | Do not stand directly above the handles. |
2. Identify What Is Holding the Auger Bit
The way the machine stopped often indicates whether the problem is soil loading, excessive depth or a solid obstruction. Use the symptoms below before deciding how to free the bit.
| How the Auger Stopped | Likely Cause | Priority Action |
| The bit continued downward but became increasingly difficult to lift. | Soil packed between the flights. | Expose the upper flights and remove soil in stages. |
| The bit is unusually heavy and wet soil clings to the flights. | Wet clay packing and suction. | Open space around the flights and clean each exposed section. |
| The auger stopped suddenly at one depth. | Stone, root or buried material. | Expose the obstruction before attempting further movement. |
| The machine twisted sharply just before becoming trapped. | Cutting edge hooked against an obstruction. | Stabilize the machine and avoid powered rotation. |
| The bit disappeared deeply with little spoil reaching the surface. | The bit screwed downward faster than soil was cleared. | Remove soil load and use shorter drilling stages afterward. |
3. Free the Bit With Gradual Soil Unloading
With the engine disabled, remove loose soil around the upper flights using a suitable hand tool. Keep hands away from the cutting edge and flight edges. Opening space around the top of the bit reduces side pressure and may release suction in wet ground.
- Step 1 — Stabilize the powerhead. One person should hold the handles while remaining clear of the bit and hole edge.
- Step 2 — Remove downward pressure. Apply a controlled upward pull instead of continuing to press the handles toward the ground.
- Step 3 — Use only small rocking movement. The goal is to loosen the soil, not bend the shaft or overload the gearbox connection.
- Step 4 — Lift and clean in stages. If the bit rises only a short distance, clear soil from the exposed flights before pulling again.
- Step 5 — Stop if parts begin to deform. Do not continue when the handles, shaft, coupling or gearbox move abnormally.
Where the actual design permits manual movement, the complete auger may be eased slightly opposite to its drilling direction after the engine has been disabled. Do not place tools on the shaft, clutch or gearbox unless the service instructions specifically permit that method.
4. Use Different Recovery Methods for Clay, Roots and Stones
Wet Clay PackingWet clay can remain attached to the flights instead of rising from the hole. As more material accumulates, the bit becomes heavier and the surrounding soil creates suction. Expose the upper flights and remove packed clay with a wooden or other non-damaging tool. Lift the bit in stages and clean each new section as it becomes accessible. Adding throttle may drive the bit deeper and increase handle reaction. |
Root or Stone ObstructionA root or stone often causes a sudden stop at a consistent depth. The cutting edge may be wedged against the obstruction or trapped between it and the hole wall. Disable and stabilize the auger, then expose the obstruction where practical. Remove it with a suitable hand tool or relocate the hole. Do not use the rotating bit as a saw or repeatedly apply throttle against the obstruction. |
5. Match Drilling Depth and Clearing Frequency to the Bit
Long bits create more contact between the soil and the flights. Wide bits carry more spoil during each lift. In sticky, compacted or collapsing ground, both factors can make removal harder even when the engine has sufficient displacement and output.
Mark the required hole depth before starting. Continuing deeper than the installation requires increases soil contact and removal difficulty without improving the finished job.
|
Configuration Reference TM-EA710 Earth AugerThe listed TM-EA710 configuration uses a 71cc two-stroke engine rated at 2.8kW. Optional bit diameters range from 10 to 30cm, with optional lengths of 80, 100, 120 or 140cm. A wider or longer confirmed configuration can retain more soil. Drilling depth, lift frequency and operator technique should therefore follow the actual ground conditions rather than engine size alone. |
Relevant for orchard planting, fence installation and farm drilling where bit dimensions and soil-clearing demands must be confirmed together.
|
6. Inspect the Bit and Powerhead After Removal
After the bit is free, clean away soil and inspect the point, cutting edge, flights and shaft. Check the connection between the bit and gearbox for looseness, damaged holes, worn retaining hardware or movement that was not present before the jam.
A dull or damaged point may require excessive downward pressure and encourage the bit to screw into the ground instead of cutting and lifting soil normally. Do not reinstall a bent bit. It may wobble, enlarge the hole unevenly and transmit abnormal vibration into the gearbox and handles.
Replacement bits, fasteners and cutting components must match the actual shaft and coupling dimensions. Similar engine capacity does not guarantee that the connection system is interchangeable.
- The gearbox housing moves separately from the engine.
- The output shaft or auger bit is visibly bent.
- The handles or frame have cracked.
- Fuel begins leaking during recovery.
- The machine produces abnormal metal noise after release.
- The bit remains trapped after loose soil has been cleared and gentle unloading has failed.
After a severe jam, reassemble the machine completely and test it above ground before returning to the hole. Confirm that the bit rotates without abnormal wobble or noise.
7. Prevent Repeated Auger Jams
Let the cutting point and edge remove soil instead of forcing the handles downward continuously. After a short drilling pass, raise the auger enough to discharge spoil from the flights, then continue toward the marked depth.
The correct clearing interval depends on bit diameter, soil moisture and how easily material leaves the hole. Sticky clay requires more frequent clearing than dry, loose soil. If less spoil is reaching the surface while the bit continues moving downward, stop and unload the flights.
Keep the machine as vertical as practical. A tilted bit rubs against the hole wall, creates uneven soil pressure and may become trapped more easily. Avoid drilling immediately after heavy rain when clay is highly adhesive unless the work method and equipment are prepared for those conditions.
8. Importer and Dealer Configuration Checklist
For orchard planting, fence-post installation and agricultural drilling, bit configuration should be matched to the soil and required hole depth. The largest option is not automatically the most practical choice.
| 01 | Confirm the expected soil type, including clay, loose soil, roots and stones. |
| 02 | Match bit diameter to the actual planting, post or drilling requirement. |
| 03 | Select bit length according to required depth and soil-removal difficulty. |
| 04 | Confirm the shaft connection, coupling size and retaining-hole position. |
| 05 | Check retaining bolts, pins and other connection hardware before delivery. |
| 06 | Identify replacement points, cutting edges and compatible bit components. |
| 07 | Include staged drilling and spoil-clearing instructions for operators. |
| 08 | Explain safe shutdown and trapped-bit recovery in the delivery instructions. |
| 09 | Confirm available configurations and spare parts in the quotation or proforma invoice. |
| 10 | Maintain the same confirmed bit and connection specification for repeat orders. |
9. Frequently Asked Questions
Why does an earth auger screw itself too deeply into the ground?
This often happens when the operator applies continuous downward pressure and does not raise the bit frequently enough to clear soil from the flights. The bit continues descending while packed spoil increases resistance around it.
Should I use full throttle to pull out a stuck auger bit?
No. Powered rotation can drive the bit deeper, increase reaction at the handles or damage the cutting edge, shaft connection and gearbox. Shut down the engine and unload the soil gradually.
How do I free an earth auger packed with wet clay?
Expose the upper flights, remove packed clay with a non-damaging tool and lift the bit in short stages. Clean each section as it becomes visible. For later holes, drill in shorter passes and clear the flights more often.
Can a root or stone damage an earth auger gearbox?
Repeated powered rotation against a trapped cutting edge can load the point, shaft connection and gearbox. Stop the engine, expose the obstruction where practical and relocate the hole when it cannot be removed safely.
Does a more powerful engine prevent an auger bit from getting stuck?
No. Engine output does not remove the effects of clay suction, excessive depth, soil packed around the flights or a solid obstruction. Bit size, soil-clearing frequency and operator technique remain important.
Which TM-EA710 bit configuration is suitable for sticky soil?
The appropriate configuration depends on the required hole size, depth and confirmed soil conditions. Wider and longer bits carry more soil and may require more frequent clearing. The final diameter, length and connection should be confirmed before ordering.
Release the Soil Load Before Blaming the EngineAn earth auger stuck in the ground is usually a soil-removal, depth or obstruction problem. For wholesale evaluation, confirm the TM-EA710 engine, bit diameter, bit length, shaft connection and replacement cutting parts as one complete configuration. |
|