
Why Is a Chainsaw Making Sawdust Instead of Wood Chips?
A chainsaw making sawdust instead of chips usually has dull cutters, incorrect depth gauges or a reversed chain. Check the cutting system safely.
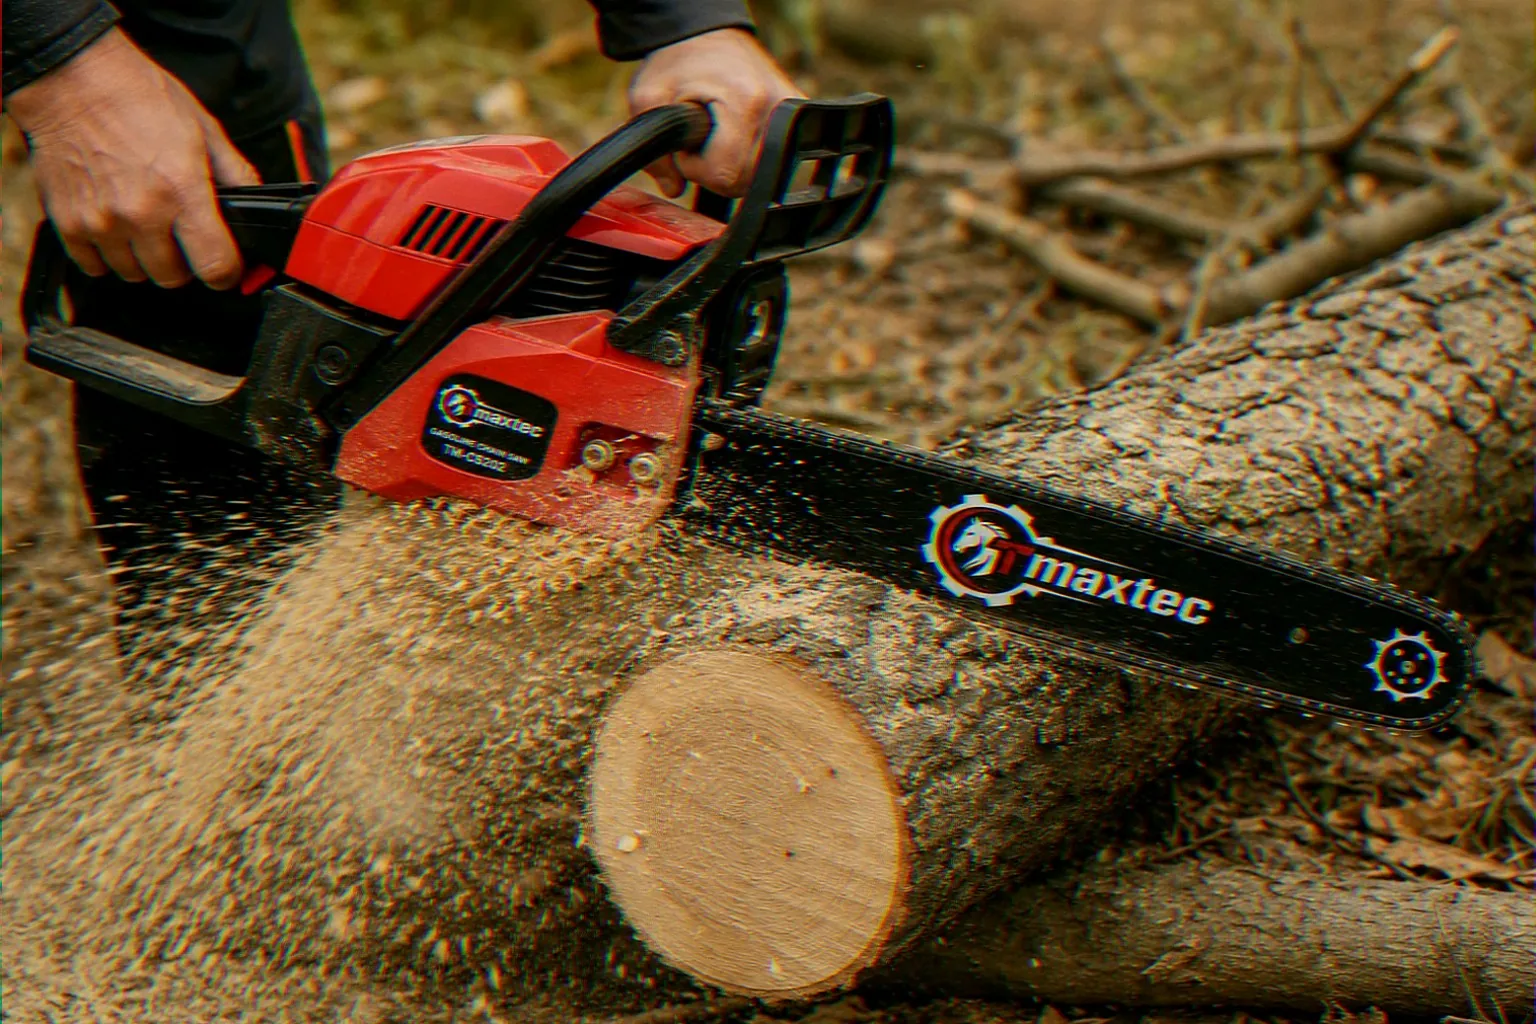
CHAIN MAINTENANCE AND DEALER TROUBLESHOOTING
Chainsaw Makes Sawdust Instead of Chips: Causes, Checks and Chain Selection
A chainsaw that makes sawdust instead of chips usually has dull cutter edges, a chain installed backward or depth gauges that no longer allow the cutters to bite deeply enough. When the engine and chain continue running but cutting becomes slow, increasing downward pressure usually makes the bar hotter without correcting the original problem.
This guide covers a gasoline chainsaw that cuts slowly and leaves fine powder while the engine and chain remain in operation. It does not cover a chain that cuts to one side, repeatedly loosens, becomes hot and tight, moves at idle or stops completely when it enters the wood.
1. Confirm Whether the Sawdust Is Actually Abnormal
The material leaving a cut varies with wood species, moisture content, decay and cutting direction. Dry or rotten timber may naturally produce smaller particles than fresh logs. Fine material alone therefore does not always prove that the chain is defective.
During a normal crosscut with a correctly sharpened chain, however, the saw should usually remove visible chips rather than only creating powder. A dull chain may still rotate quickly and sound normal while removing very little wood.
Signs that the cutting system needs inspection
- The operator must push heavily to keep the chain moving through the wood.
- Cutting speed falls even though the engine continues running normally.
- Smoke appears even though the timber is not wet.
- The guide bar becomes unusually hot.
- Vibration increases as more downward force is applied.
- Fine powder accumulates in the kerf instead of being cleared as chips.
These symptoms direct the first inspection toward the chain, depth gauges, bar groove and lubrication system rather than toward engine displacement or rated power.
2. Stop the Engine and Check Chain Direction First
Switch off the engine, engage the chain brake and wait until the chain has stopped completely. Disconnect the spark-plug cap before touching the cutting chain, guide bar or clutch-cover area.
Wear cut-resistant gloves. A stationary chain can still cause injury, especially when fingers are placed between the cutters and the guide-bar rails. Do not test sharpness by sliding a finger along the cutter edge.
| Inspection point | Correct condition | Fault indication | Required action |
| Top of guide bar | Sharpened cutter edges face toward the bar nose | Cutting edges point back toward the engine | Remove and reinstall the chain correctly |
| Underside of guide bar | Cutters face back toward the saw body | Cutters face toward the bar nose | Correct the chain installation |
| After chain replacement | Direction matches the original chain or bar marking | New chain rotates but only scrapes the timber | Stop testing and verify orientation |
A backward chain can travel around the guide bar but will not cut correctly. The cutters scrape across the timber instead of entering it with their sharpened leading edges.
This check is especially important after a new chain has been fitted, the guide bar has been removed for cleaning, a dealer has assembled the saw before delivery or the replacement chain was installed without comparing it with the original orientation.
3. Inspect Cutter Edges and Depth Gauges
Look for rounded or damaged cutter edges
A sharp cutter has a defined working corner where the top plate and side plate meet. Contact with dirt, sand, stones, nails or the ground can round this edge quickly.
A chain may become dull after only brief contact with soil. This often happens when a log lies directly on the ground and the guide-bar nose passes through the timber into the soil below.
| 01 | Check for rounded cutter corners and reflective lines along the working edge. |
| 02 | Inspect for chipped top plates, bent cutters or local impact damage. |
| 03 | Compare cutter lengths around the complete chain rather than judging one tooth. |
| 04 | Check whether repeated sharpening has left some cutters much shorter than others. |
A sharp edge generally reflects very little light. A bright line along the cutter corner often indicates that the edge has rounded over. Inspect the full chain because only one section may have contacted soil or metal.
Check the depth gauges after repeated sharpening
Each cutter is followed by a depth gauge, also called a raker. The height difference between the cutter and the depth gauge controls how deeply the tooth enters the wood.
Every sharpening operation lowers the cutter slightly. If the depth gauges are never adjusted, they may eventually stand too high relative to the cutters. The chain can then appear sharp but remove only a thin shaving, producing slow cutting and fine sawdust.
Important: Use the depth-gauge tool specified for the chain. Filing too little will not restore the required bite, while filing too much can make the chain grab aggressively, increase vibration and raise kickback risk. A value suitable for one chain type should not automatically be used for another pitch or cutter design.
4. Check the File Size and Sharpening Method
Using the wrong file diameter changes the cutter profile. A file that sits too high or too low can produce an edge that looks pointed but does not cut effectively.
The filing angle also needs to remain reasonably consistent. Large differences between left- and right-facing cutters can make the chain cut roughly, vibrate or place uneven loads on the guide bar.
Manual filing priorities
|
Workshop grinder risksAn electric grinder removes material quickly, but excessive grinding can overheat the cutter or shorten the chain unnecessarily. Set the grinding angle and stop position for the confirmed chain type before servicing multiple dealer returns. |
Remove only enough metal to restore the cutting edge. Repeatedly reducing all cutters to match one severely damaged tooth can shorten the useful chain unnecessarily.
5. Do Not Compensate With Engine Power or Downward Pressure
A sharp chain should feed into the timber with controlled operator pressure. Pressing harder does not restore a rounded cutting edge or correct a depth gauge that is too high.
Excessive pressure can:
- Increase guide-bar friction and temperature.
- Accelerate bar-rail wear.
- Make the saw harder to control.
- Increase load on the clutch and drive sprocket.
- Hide the original chain-maintenance problem.
The TM-CS5202 is listed with a 52cc engine and a 2.0 kW reference rated output, but available engine power cannot compensate for a chain that is backward, dull or incorrectly filed.
If the engine remains strong while the chain produces powder, inspect the cutting system first. If the engine itself loses speed sharply as the chain enters the wood, that is a separate load-related symptom and requires a different diagnostic process.
6. Inspect Wood Contamination, Lubrication and the Guide Bar
Consider contamination in the timber
Logs used on farms, construction sites and timber yards may contain sand, dried mud, wire, nails or small stones. These materials can damage a newly sharpened chain almost immediately.
Clean loose soil from the cutting area where practical and raise logs off the ground so the guide bar does not enter dirt at the end of the cut. Stop if the chain suddenly begins producing sparks, unusual vibration or fine dust.
Dealers supplying chainsaws for firewood cutting may need to explain that rapid dulling often reflects worksite contamination rather than a manufacturing defect.
Confirm that chain oil reaches the guide bar
Insufficient lubrication does not normally create fine sawdust by itself, but it increases friction and accelerates wear of the cutters, bar and drive components.
Before cutting, confirm that the chain-oil tank contains the correct lubricant and that oil reaches the guide bar. The TM-CS5202 product information lists a 260 ml oil-tank capacity.
Stop the saw if the chain smokes, the bar becomes unusually hot or the chain becomes difficult to move after shutdown. If the chain remains dry after the oil port and bar hole are cleaned, the lubrication system requires separate inspection.
Clean and inspect the guide-bar groove
Packed sawdust and oil can accumulate inside the bar groove and behind the clutch cover. Remove the guide bar and clean:
- The complete guide-bar groove.
- The oil inlet hole.
- The bar mounting slot.
- The area around the drive sprocket.
- Packed debris behind the clutch cover.
Inspect the bar rails for burrs, uneven height or excessive spreading. A badly worn groove may allow the chain to lean rather than remain upright.
With the engine stopped and suitable gloves worn, the chain should move smoothly around the cleaned bar. Tight spots may indicate damaged drive links, a worn nose sprocket or local guide-bar damage.
7. Match the Replacement Chain to the Actual Configuration
A replacement chain should not be ordered only by engine capacity or nominal guide-bar length. The pitch, gauge and drive-link count must match the guide bar and drive sprocket fitted to the actual saw.
Before ordering a spare chain, confirm:
- Guide-bar length.
- Chain pitch.
- Chain gauge.
- Number of drive links.
- Drive-sprocket type.
- Guide-bar part number or specification marking.
Specifications may vary with the confirmed order configuration. Chain compatibility should therefore be checked against the actual bar, sprocket and chain supplied with the machine.
8. Decide Whether to Sharpen or Replace the Chain
Sharpen the chain whenThe cutters are dull but remain structurally complete, the drive links and rivets are in acceptable condition, and the cutter geometry can be restored without exceeding the wear limits. |
Replace the chain whenThere are cracked or broken links, missing cutters, damaged drive links, loose rivets, severe heat discoloration, worn-out cutters or uneven damage that cannot be corrected safely. |
Do not repeatedly grind a heavily damaged chain simply to avoid replacement. Remaining cutter length and the condition of the full chain matter more than creating a sharp appearance on one tooth.
For dealer service kits, correctly matched files, depth-gauge tools and clearly identified spare chains are more useful than a generic chain supplied without its pitch, gauge and drive-link count.
Importer and Dealer Service Checklist
- Confirm the complaint boundary. Verify that the engine and chain remain in operation while cutting is slow and fine powder is produced.
- Check chain direction. Make sure the sharpened edges face forward on the top rail.
- Inspect the full cutter loop. Look for rounded edges, reflective corners, chips and unequal cutter lengths.
- Measure depth-gauge condition. Use the correct tool rather than filing the rakers by eye.
- Confirm file compatibility. Match file diameter and sharpening angle to the chain type.
- Check worksite contamination. Ask whether the chain contacted soil, sand, stone, wire or nails.
- Verify chain lubrication. Confirm oil level, oil-port cleanliness and visible delivery to the bar.
- Clean the guide-bar groove. Remove packed debris and inspect rail wear and tight spots.
- Record the chain specification. Note bar length, pitch, gauge and drive-link count.
- Separate sharpening from replacement. Replace chains with damaged links, rivets, drive links or cutters beyond safe correction.
- Control repeat-order consistency. Confirm that spare chains and bars match the configuration stated in the quotation or proforma invoice.
Frequently Asked Questions
Why is my chainsaw making fine sawdust instead of chips?
The most common causes are dull cutter edges, a backward chain or depth gauges that have become too high relative to the cutters after repeated sharpening.
Can a chainsaw chain be installed backward?
Yes. The chain can still rotate around the guide bar, but the cutters will scrape instead of cutting. On the top rail, the sharpened cutter edges must face toward the bar nose.
Why does a sharp-looking chain still cut slowly?
The depth gauges may be too high, the file profile may be incorrect or the guide-bar groove may prevent the chain from running steadily. Visual sharpness alone does not confirm correct cutter geometry.
Can touching soil dull a chainsaw chain immediately?
Yes. Brief contact with dirt, sand or stones can round the cutter edges quickly, especially when a log is cut directly on the ground.
Should I press harder when the chainsaw produces powder?
No. Extra pressure increases heat, bar wear and clutch load without restoring the cutter edge. Stop cutting and inspect the chain and depth gauges.
Can I order a spare chain only by saying it is for a 52cc chainsaw?
No. Engine size does not identify chain compatibility. Confirm the guide-bar length, pitch, gauge, drive-link count and sprocket configuration.
When should a dealer replace instead of sharpen the chain?
Replacement is appropriate when the chain has cracked links, damaged rivets, missing cutters, severe heat damage, damaged drive links or cutters that have reached their wear limits.
Match the Chain Before Confirming a Bulk OrderWhen a chainsaw makes sawdust instead of chips, restore the cutter geometry before checking engine power. For TM-CS5202 wholesale orders and spare-parts planning, confirm the selected bar length, chain pitch, gauge and drive-link count in the quotation or proforma invoice. |
|